Tuesday, January 18, 2011

Kitchen Renovation - Day 11

After being away all weekend, we came home to a great surprise - - our backsplash and countertops are done!  We selected a 1x2" alabaster marble subway tile for the backsplash, with snow white non-sanded grout.  I think it looks great - very clean and polished.  And it really ties everything together.


Here you can see the finished countertop on the fridge-side.  We opted for an overhang past the last cabinet so that there is a place for Cillian to sit while I'm cooking.  We couldn't fit another cabinet in that spot, but also wanted to maximize whatever counter space we could.  I think it turned out really well.


Our sink and faucet are also now fully installed and working.  We went with a D-Shaped sink, which is definitely big enough to wash pots and pans, but doesn't take up as much valuable counter space as a double welled sink.  I think it was a good choice - - yet another recommendation of Brandon that turned out so well.


And finally, our bathroom renovation is really getting underway!  Mike laid all of the tile.  I think it looks great.  Very clean and classic looking.  The white octogons are also made out of the white alabaster marble that our backsplash is made from.  We're really moving now!


Saturday, January 15, 2011

Bathroom Renovation - Color Pallete

Alongside our kitchen renovation, we are also completely renovating our powder room, just off the back of the kitchen.  In all of the kitchen hubub, this has nearly been forgotten!  The powder room is small, but has very high ceilings like the rest of our house, and a window out onto the screened-in porch (which will be appropriately covered with a window treatment).  For the floors we have picked out a very traditional tile, like this:


It is made out of alabaster marble and black marble.  We bought a porceline pedestal sink, and are re-using the porceline toilet.  Our contractors are going to make a radiator cover for the small bathroom radiator, and use a left-over piece of our granite countertops for the top of the radiator cover.  This way it can double as a shelf.

Here is what we are thinking of for the color pallete:


We are thinking of using the second-darkest blue - "Gentleman's Grey" - on that color wheel.  (I only had a sample of the tile in the basketweave pattern, but it is the same material, so you can see what the colors will be.)  The tile and color wheel are sitting on top of our kitchen counter.

What do you think?


Friday, January 14, 2011

What am I Working On? . . . It's a Surprise!


Here is a sneak-peak.  This is a gift for a friend, so I don't want to reveal it yet... more next weekend.

Thursday, January 13, 2011

Kitchen Renovation - Day 8

It's starting to look like a real kitchen!  Our appliances are in and hooked up.  You can see the dishwasher, range, and convection microwave here.  We haven't tested anything out yet, but we're excited to give them a whirl soon!  We're just waiting on one more cabinet that will go to the right of the range on the bottom and to the right of the microwave on the top.  You can just see where the wall juts out a few inches, which apparently is part of the structural support for our stairs.  So we had to shrink those cabinets a little from what was in thh plans.


And here is the refrigerator.  Our contractors had hooked it up in the living room for us to use during the renovation, and it's actually taking a little effort to get used to it being in the kitchen!

Kitchen Renovation - Day 7

Sorry I am a little behind in getting this post up!  The first piece of granite was installed on Tuesday!  It looks fabulous.  We are so pleased with how everything is coming together.


Cillian is particularly overjoyed :)


Tuesday, January 11, 2011

Kitchen Renovation - Day 6

The real progress today was that the granite for our countertops arrived!  We ended up choosing a piece of absolute black granite that has a very light leathered finish.  We were originally thinking that we wanted a honed piece, but this leathered granite pretty much fell into our laps after the deft negotiating of our contractor.  We got it for a totally reasonable price, and it is goregeous!
I really don't know how they got it out of the van and into our backyard, but here it is - being cut and finished!


Here is a close-up of the stone:

Kitchen Renovation - Day 5

All of the cabinets are in place!


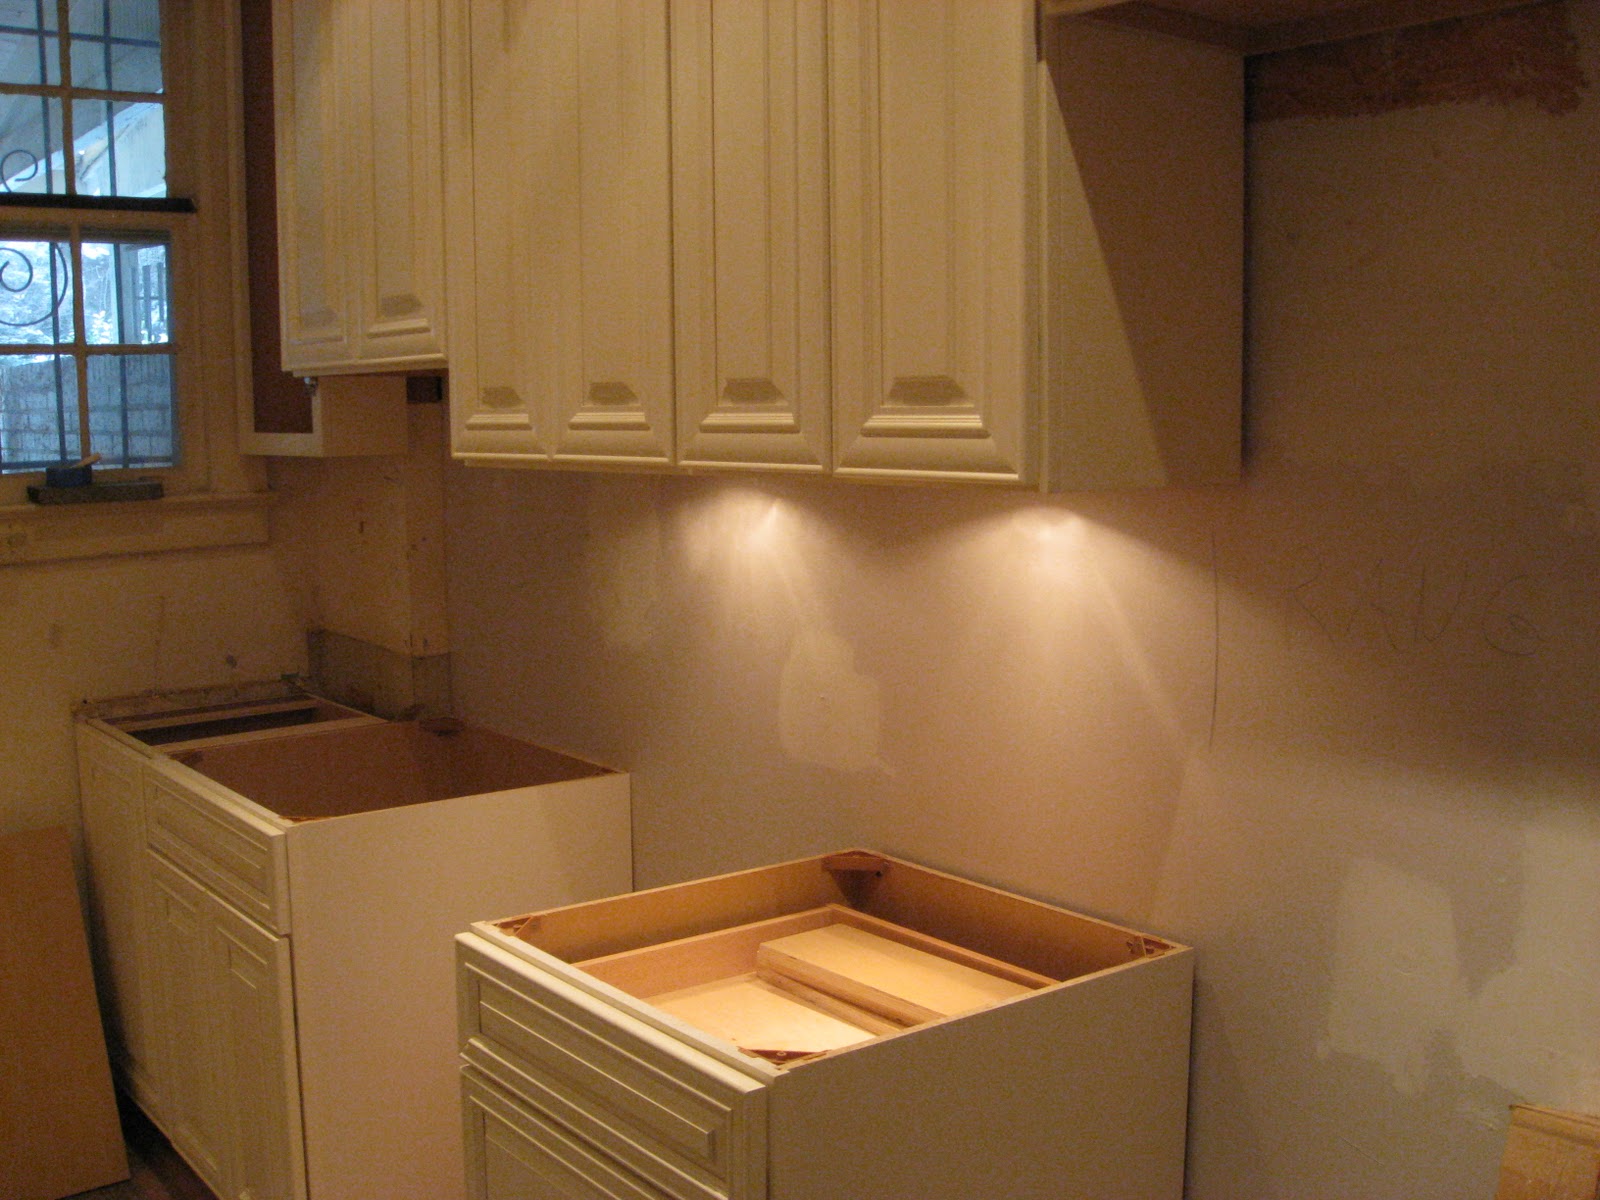
The under-cabinet lights are installed.  All of the electrical outlets and light switches are installed under the cabinets as well, so that the backsplash will be one continunous run of tiles.


  I didn't get a good picture of it, but they also installed lighting above the cabinets so the space between the cabinets and the ceiling is softly lit as well.

Friday, January 7, 2011

Kitchen Renovation - Day 4

The upper cabinets are hung! 


We are thrilled with the way the cabinets look so far.  We had been slighly concerned that the cream color would be too creamy, but it works perfectly.  It looks clean and bright, not old and dingy like the old cabinets! 


On this side you can see the opening for the refrigerator and the upper cabinets that are going to have glass-front doors, on the right side.  Amazing progress again!

Thursday, January 6, 2011

Kitchen Renovation - Day 3

Everything is still going according to plan in our kitchen.  Each morning we have a meeting with the contractor and his team to go over the plans for the day.  This morning we made some additional design choices on the layout of the upper cabinets.  Here are Brandon's hand-drawn plans - right on our wall - that we decided to go with.


Most of the work today was behind the scenes (wiring, plumbing, gas lines, etc.), but they did get the pantry sheet-rocked, and also added sheetrock to some areas where the plaster had cracked and fallen off of the walls.


Assuming that everything goes well, the upper cabinets should be hung by the time I post next!


Wednesday, January 5, 2011

Free-Motion Quilting

So I thought I would try my hand a free motion quilting for the Irish Garden quilt I am working on.  This is the pattern I selected for half of the squares (the other pattern is also four hearts, but the pointed ends are facing out instead of into the center).  Granted this was an early attempt, but I'm not sure my skills are quite up to snuff!

Any hints about how to make it smoother?

Kitchen Renovation - Day 2

When I arrived home last night, our new ceiling, complete with recessed can lights was finished!  The ceiling was constructed by nailing a "ledge" around the walls and then hanging the drywall from that.  We decided to install this new ceiling because the original plaster ceiling had cracked from the house settling, and probably would continue to crack over time.  This ceiling should be more resistant to cracking than the old plaster ceiling.


The guys also framed out our new pantry.  We were originally going to keep the old pantry, but they wanted to remake it because the old one was in bad shape.  You can see that there is a gap between the 2x4 and the wall - it is actually flush with the wall at the floor, but the walls are so out of square that there is about an inch gap at the top.  This pantry is probably the only thing that is level and square in our whole house right now!


And finally, just a picture to show the wood floors in the entryway with all of the parquet removed. 

Tuesday, January 4, 2011

Kitchen Renovation - Day 1

The first day of our kitchen/bathroom/entryway renovation is over and we are very impressed with the progress.  The entire kitchen has been stripped and hauled away (except for the refrigerator, which we will donate to Habitat for Humanity).  It's amazing how big the kitchen looks with everything removed!  We were worried that there would be pipes, wires, etc. behind the soffets above our cabinets, but luckily they were just for show and the original plaster walls were the only thing back there.


The other great surprise was that when they pulled up the old parquet floors in our entryway, there was beautiful white oak hardwood underneath!  It is in perfect condition, except for a few nail holes from where the parquet subfloor was nailed.  These wood floors run all the way through the kitchen to the back of the house, so we will now have the original hardwood throughout.  Often in older houses the more expensive wood was used only for floors in the living room and dining room areas, with cheaper pine in the kitchen and bedrooms.  Luckily for us, our house was built with the nicer white oak throughout. 


I think George was the only one not excited by the first day's progress.  He's not too happy about the strange men tearing apart his house.  Our lovely neighbors are going to take him today, so he'll be able to nap in peace!


Monday, January 3, 2011

Kitchen Renovations!


No, we weren't robbed of all of our food and dishes this weekend, our kitchen renovation started today!  In preparation, we totally moved out of the kitchen over the weekend.  Most of the pots, pans, serving dishes, etc. went into storage in the basement, but I also created a small temporary pantry in the dining room that I think has everything we'll need to get by for the next few weeks until we can move into our brand new kitchen!


This will be quite the experiment.  I've set aside a set of nesting bowls, a strainer, a couple of serving dishes, select serving and cooking utensils, six sets of our every-day china and silverware, 2 cups, 2 mugs, a cheap stock pot that I can put on the grill, the crock pot, and a large stack of towls and ziplock baggies. 

It's already turning into a fun challenge to try to figure out each piece of the puzzle that we will need to make it through the next month without a kitchen.  In addition to the mobile pantry, we set aside two coolers - one for the "refrigerator" and one for the "freezer."  Luckily it's very cold outside right now and we can put these on the screened-in porch to stay cold.  We also turned a 2-drawer plastic file cabinet into a mobile pantry that has cereal, crackers, oil, vinegar, and the like.  Our grill is large and has a gas side-burner, and my co-worker has generously lent me her electric fry pan!  I think we'll be able to make it.  It will all be worth it in the end! 

Happy New Year!


The wonderful delivery men from Sears brought us a wonderful New Years present yesterday morning!  All of our new appliances for the kitchen renovation arrived, and luckily all fit through our narrow DC-row-house doors and hallways and are now being stored in our living room!


The delivery men had to take our front door entirely off its hinges, but I have to say they did an excellent job - not even one scratch on the walls!


This is the current state of our living room... we just have to remember it is only temporary!

Thursday, December 30, 2010

Chicken Curry

This recipe is a slight alteration to the chicken fricassee with a curry addition.  It is not too fast, but it only takes about an hour and the curry sauce is deliciously flavorful.  I made my own chicken stock for this recipe, following the usual method, but added about five whole cloves to my herb mixture, which gave the stock a very aromatic, spicey quality that was perfect for the chicken curry and accompanying rice.

Ingredients:
- Parts of 1 whole large chicken (or you could use 4 chicken breasts), cut into 1-inch-cubes
- 4T butter 
- Medium yellow onion
- Large carrot
- Large stalk of celery
- Salt & Pepper
- 3T flour
- 1T curry powder
- 3c chicken stock
- 1c white wine
- 1/4c cream
- 2T butter

Melt 4T butter in a french oven.  When hot, saute onions, carrot, and celery.  When tender, add the chicken pieces and allow to cook for about five minutes, turning every minute until tender but not browned. 


Lower heat to very low, cover and cook chicken for another 10 minutes.  It will plump a little as it cooks, but don't let it brown.

After 10 minutes, sprinkle with flour and curry powder.  Stir to make sure the flour covers all sides of the chicken, and allow to cook for about 4 more minutes, covered.   

Pour in chicken stock and wine.  It is best if the chicken stock is hot when you add it, but if not, bring the liquid up to a very soft boil.  Cover and maintain at a slow simmer for 20 minutes.  


When chicken is cooked, remove chicken and vegetables.  I used a slotted skimmer to do this, which was perfect for the job. 

Bring to a medium boil to reduce to a sauce consistency.  Add cream and bring back to a simmer.  If necessary, season with cayenne pepper and salt. 


Serve rice, chicken and vegetable mixture, and then sauce over top.  

Bon Appetite!

Wednesday, December 29, 2010

Irish Garden - Quilt Sandwich!

The Irish Garden quilt is moving right along!  I have now officially made my quilt sandwich!  Cillian helped me put in all the basting pins and select the pattern for quilting in each of the squares.  Hopefully I'm on track to get this done in the next four weeks!

Tuesday, December 28, 2010

The Best Rice I Have Ever Made

I used to be really good at making rice.  It seemed so easy - just bring rice and water to a boil and then simmer.  It always turned out fluffy and tender.  Then I lost my touch.  I don't know how it happened, but every pot of rice I tried to make either burned, or turned out sticky or dry.  I finally caved and bought a rice cooker.  The rice cooker works okay, but not great.  At least it produces consistent results. 

But then, last night, I made rice according to Julia Child's rissoto recipe.  It was perfect.  Now I know you're thinking "Rissoto?!  No way am I standing over a pot and doling out ladle-fulls of boiling stock for twenty minutes while constantly stirring."  This rissoto recipe does not require such active care.  You start it on the stove-top and then move it to the oven.  It does not take on the sticky, almost creamy texture of typical rissoto.  It is more like the most perfect rice you've ever had.

Ingredients:
- 1 1/2c long-grained white rice
- 3c stock, hot
- 1c wine
- 1/2c finely chopped yellow onion
- 4T butter
- Salt and pepper

Melt butter in an enameled cast iron "french oven" over medium heat.  Add chopped onion.  (Julia Child's recipe calls for only 1/4c onion, but I think a little more is nice, depending on what you're going to use it for.  I made mine for chicken curry, so a little more onion was appropriate.  I also added 1/2t tumeric.)  Let this cook for about 5 minutes, stirring occasionally, but do not let it brown. 

When the onion is soft and translucent, add the rice and stir to incorporate.  Allow the rice to cook for about 2 minutes, but, again, do not let it brown.  The rice should take on a milky sort of color when it has absorbed some of the butter and onion flavor.  At this point, you can add spices or seasonings if you want, depending on what you are serving your rice with.

Add the chicken stock and wine.  Your chicken stock should be hot, so that the rice comes to a boil very quickly.  Cover and move to an oven pre-heated at 375 degrees.  Peak at the rice after about 3-4 minutes.  It should be simmering.  Reduce your oven temperature to 350 degrees and let cook for a total of 18 minutes in the oven.  Check on your rice once to make sure that it is on track to cook in about 18 minutes.  After 18 minutes, tilt the pot up on its corner and move the rice along the edge of the pot away so that you can see down to the bottom - make sure all of the liquid is absorbed. 


Carefully fluff the rice with a large buffet fork without breaking the grains.  Now you can return your pot of rice to the turned-off oven to keep warm until you are ready to serve.  Your rice should be tender, fluffy, and soft with a little bit of "bite" in the center, and have lovely buttery flavor. 


Bon appetite!

Monday, December 27, 2010

Aunt Wendy's Chocolate Pie

This chocolate pie recipe is everything you hope a chocolate pie will be and rarely is.  It is a sophisticated alternative to the usual cookies and candy that often end christmas meals.  As a plus, it is very easy to make and is best made one day ahead of time.

Ingredients:
- 1c butter, room temperature
- 1 1/2 c sugar
- 3 squares unsweetened bakers chocolate, melted
- 1t vanilla (for pie filling) + 1/2t vanilla (for whipped cream topping)
- 4 eggs (pasteurized)
- Pie crust
- Heavy whipping cream
- 2T powdered sugar
- Chocolate to shave for garnish

Cream the sugar and butter until fluffy looking.  Add the chocolate and 1t vanilla and mix well to incorporate.  Then add the eggs one at a time with the mixer running at medium-high speed, allowing to run for five minutes in between adding each egg.

Meanwhile, lay your pie crust in your pie pan, trim to fit leaving about 1-inch extra, flute, prick all over with a fork and bake until golden.  This would be a good pie crust to bake blind so you don't get any air bubbles under the crust.

When the crust is cool, pour in your chocolate mixture and chill in the refrigerator.

Clean your mixer bowl and then cream the whipping cream on high speed until fluffy.  Add in 1/2t vanilla and powdered sugar and mix to incorporate.  Set aside your whipped cream topping and add to the pie before serving.  Shave chocolate over the top.

Wednesday, December 22, 2010

Mediterranian Calzones

These calzones are tasty and so easy.  The hardest part is making your pizza dough, but you could make some on Sunday for pizza and then use the left-over for calzones the next day.  You could mix and match the ingredients in the calzones depending on what you have handy in your kitchen.  This is also a great way to add fresh flavors to your winter dinner rotation.

Ingredients:
- Pizza dough
- Olive oil
- 1T dried oregano
- 4c fresh baby spinach
- 1 can small artichoke hearts (reserve liquid)
- 1/2c diced roasted red pepper (or about 2 peppers)
- 2T capers
- 2T tomato paste
- 1 small onion, halved and sliced
- 4c shredded mozzarella
- 1c grated parmesan 

(This recipe makes 4 large calzones, even though only two are pictured below.)
Heat your pizza stone in a 450-degree oven. 
 
In a skillet, heat about 1T olive oil over medium heat.  Add onion and saute until wilted and translucent.  Add tomato paste and stir to coat onions.  Continue to cook for another minute or so until the tomato paste smells sweet and is thickly coating onions.

Add artichoke hearts, roasted red pepper, and capers.  If the tomato paste is very thick, you might want to add a little bit of the liquid from the canned artichokes, just to loosen things up a bit and create more of a thick sauce consistency.  Then add the spinach and let it cook down.  You might have to add it in two batches, depending on how big your pan is.


Turn off the heat and allow mixture to cool slightly while you prepare the crusts. 

Divide your dough into balls about half of the size of your fist.  Stretch out into rectangles.  Place about one heaping cup of your vegetable mixture on the middle of one side of the dough.  Top with about 1c shredded mozzarella.  Make sure to leave about a half-inch dry dough around the edge so that when you fold the dough over it will stick together.  Fold the dough over to create a square and press the dough together around the edges. Sprinkle generously with grated parmesan. 

Move onto the pizza stone and cook for about 15 minutes, or until nice and toasty brown. 


Let cool for about 10 minutes and serve!

Tuesday, December 21, 2010

Hot Chocolate Shortbread Cookies

These cocoa shortbread cookies taste just like hot chocolate in a cookie form.  They are fabulously rich yet light.

Ingredients:
- 1/2c cold butter
- 1/2c powdered sugar
- 1/4c cocoa powder
- 1/4t coarse salt
- 1/2t vanilla
- 1c flour
- 1/4c heavy cream
- 2oz white chocolate

In the bowl of a food processor combine the sugar, cocoa, and salt and process to combine.  Cut the cold butter into small pieces by cutting it in half length-wise and then each half of the stick in half length-wise again so you have 4 small sticks.  Then cut the sticks into about ten pieces so you have small pats of butter.  

With the blade running, add the butter a few pieces at a time until the butter is fully mixed and the dough is crumbly.  Add the vanilla.  

Pack the dough together into a ball.  If the dough is too dry to hold together you may have to add about one tablespoon of water.  I also found that it helped to let the dough sit in the blender for a few minutes and then process it again after the butter has softened slightly.   

Roll out on a surface lightly dusted with powdered sugar.  Cut out cookies and place on a cookie sheet.


Bake at 300 degrees for about 20 minutes.  Cool.

Heat the cream in a saucepan over medium heat until it comes to a very soft simmer, the add the white chocolate and stir until melted and smooth.  When smooth, turn off the heat and let cool for about 5 minutes.  Then dip a spoon in the chocolate and let drizzle over the cookies.